Integrate WordPress & SalesForce CRM with Gravity Forms
What? Your CMS and CRM don’t communicate?
And so you want to perform a WordPress & SalesForce Integration? Oh, and you want your Gravity Forms to send its data to SalesForce? No problem… read on for a detailed “how to”.
Surprisingly, even with today’s technology, you still need a programmer to integrate your CMS (content management system) and CRM (customer relationship manger). However, I hope that this post will help you do it yourself.
If you already have your SalesForce Web-To-Lead HTML and are ready to use Gravity Forms to integrate the two; skip down to the how to.
Don’t yet have Gravity Forms? – Go and get it because it will make your form making life super dooper easy! — Easy visual editor for making forms, choosing which fields are required, sending emails after form submits, multi-page forms, etc, etc, etc… AND you can use this tutorial to integrate WordPress w/ SalesForce! — NO BRAINER :: Go get it NOW! 🙂
Which CMS & CRM Combination Is Right For You?
- Which CMS Do You Use?
There are so many different content management systems out there today – among the most popular are WordPress, Joomla, Drupal, DNN, etc. All of which have their own benefits and fallbacks.
- Which CRM Do You Use?
Again, there are many to choose from; you have SalesForce, NetSuite, SugarCRM, etc. And again, each has various positives and negatives. However, any CMS & CRM can be integrated, with a little experience and some help from your friendly neighborhood SEO firm.
- Which Combination Is Best For You?
We here @ WebMechanix are advocates of WordPress as a CMS and SalesForce as a CRM (we know the others intimately as well, but prefer working with those). More specifically, we will detail how to integrate or sync a popular WordPress Form Builder plugin called “Gravity Forms” with the SalesForce software.
Therefore, the rest of this blog post will be centered on a WordPress & SalesForce integration, though the techniques could definitely help with any other CMS and CRM combinations.
WordPress – SalesForce Integration with Gravity Forms
From the top – is your goal to make it so that when someone fills out your website’s contact form, that data not only gets emailed to you, but it also gets passed into SalesForce?
If so, excellent – read on… otherwise, what are you trying to do? We can help.
SalesForce has a feature they call Web-To-Lead. Just like it sounds, this feature allows you to integrate your web contacts into SalesForce leads.
Sounds simple, doesn’t it? Well to some extent, it is.
But what if you want to get fancy? And let’s face it, everyone wants to get fancy.
Let’s Get Fancy (In a Sophisticated Way)
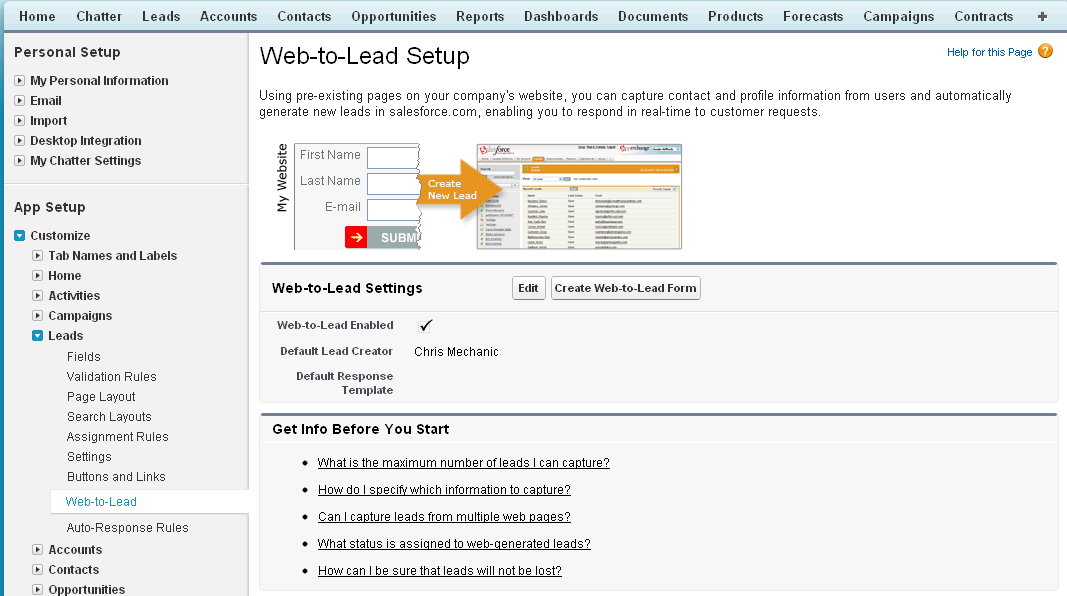
Hop into your SalesForce and click “Settings” from the menu that drops down when you click your name from the upper right of the screen.
In the settings menu, under “App Setup” on the left hand side, click “Leads” to drop down another list, and then choose “Web-To-Lead” from there.
You should have a screen that looks like this:
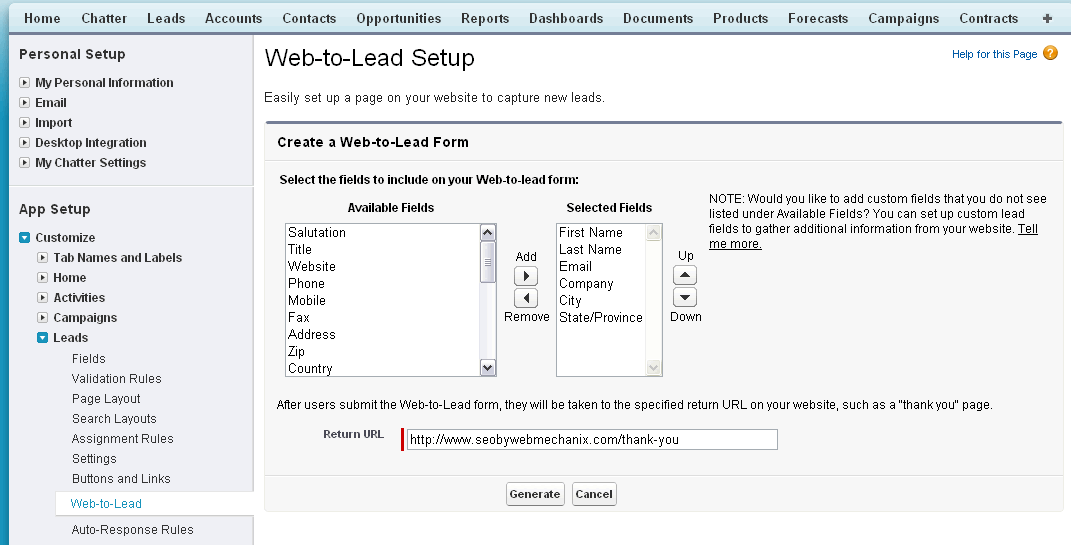
Click “Create Web-To-Lead Form” to get started. The next screen will ask you which data fields you want to capture. Choose wisely.
The “Return URL” is equivalent to your “Thank You Page” – the page you’d like the user to see after they’ve submitted the form. Don’t forget to set up a Google Analytics goal for that thank you page.
When you click “Generate”, SalesForce is going to give you some HTML code. This code generates a contact form on your website that sends its data to SalesForce.
I know what you’re thinking: “Wait, I use Gravity Forms to create contact forms on my website but how do I sync or integrate Gravity Forms with SalesForce Web-To-Lead?”
That is a good question; keep reading for the answer.
WAIT! — You need to have Gravity Forms in order to move forward from here… Don’t have it? NO PROBLEM :: Click here to get Gravity Forms (the best WordPress Plugin you will ever download, trust me).
How to Sync Gravity Forms and SalesForce Web-To-Lead
Since we’re doing a WordPress & SalesForce integration using Gravity Forms, you will need:
- The HTML code that SalesForce gave you for the web-to-lead contact form.
- To be logged into your WordPress admin in your Gravity Forms menu
As an example, let’s suppose you want to collect the following information from your website visitor:
- First Name
- Last Name
- Company
- Address (Street, City, State, Zip)
You will be able to collect more or less information by following the pattern laid out below.
Step 1: Create Your SalesForce Web-To-Lead Form
As detailed above, you will first need to create the SalesForce web-to-lead form and have the HTML they give you handy.
This will give you the crucial information you need in order to integrate WordPress and SalesForce using Gravity Forms (namely the URL to send the data to and the form field names).
Once you have that, move on…
Step 2: Create Your Gravity Form
Your goal here is to replicate your SalesForce Web-To-Lead form by making a Gravity Form which collects the same data, field for field.
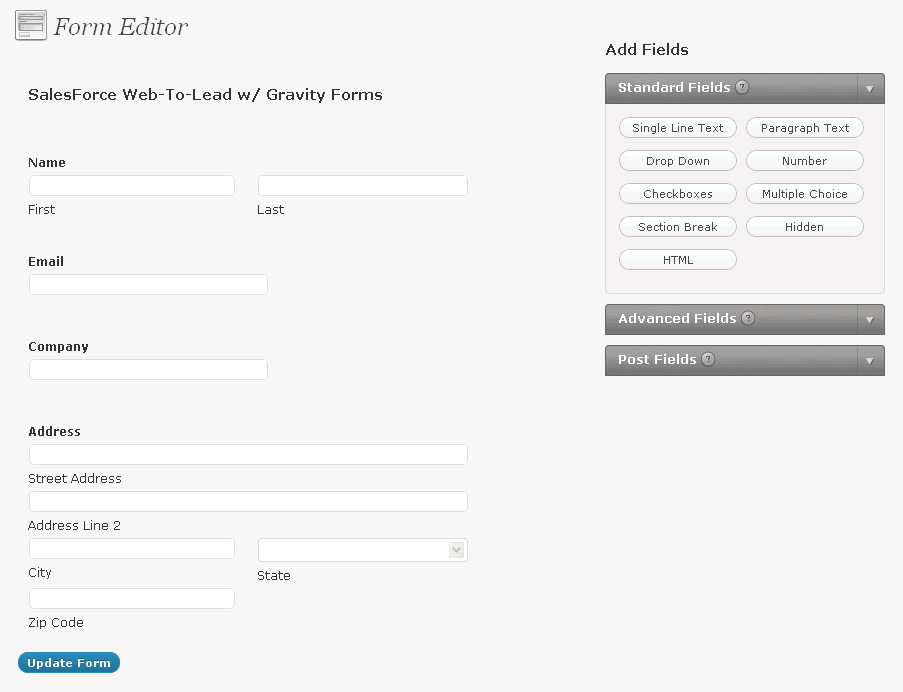
Remember that in our example, we are collecting first & last name, email, company, and address; therefore my Gravity Form is as follows:
Note: For the “company” field, I used a “Single Line Text” box from the “Standard Filed Menu” and changed the Field Label to “company”
Note: For the “address” field, I used the “Address” field from the “Advanced Field Menu” and changed the Address Type to “United States”
Step 3: Save The Form Now
The next step won’t work unless you actually save at this point. After pressing save, choose the option that allows you to “Continue Editing” this form.
Step 4: Sync Gravity Forms To SalesForce
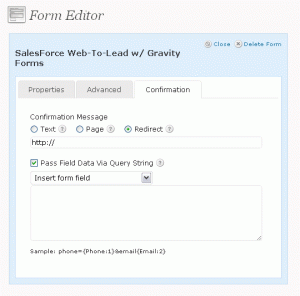
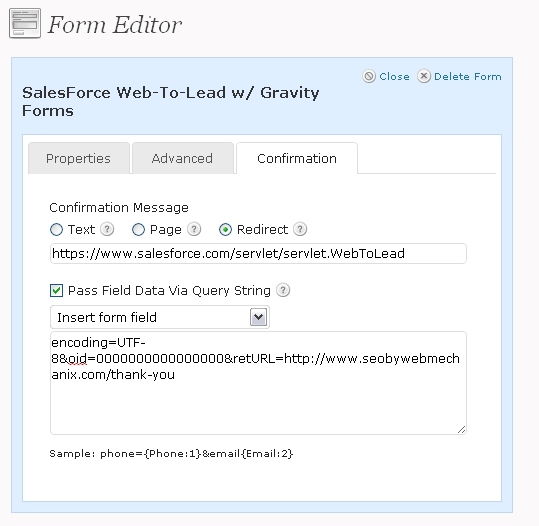
To do this, click the Gravity Form’s name and find the “Confirmation” tab. Click into that tab, and then change the “Confirmation Message” to “Redirect”.
After that, click “Pass Field Data Via Query String” – Your screen should look something like this:
Here’s the hard part… do you still have your SalesForce Web-To-Lead HTML handy? You need it now.
Let’s dissect the SalesForce HTML:
Note: I removed all the commented HTML code (anything wrapped with <!– –>)
You want to fill out your Gravity Forms as follows:
1 – The URL to “Redirect” your Gravity Forms data to
2 – Hidden field that is your SalesForce company ID (I changed ours to all zeros to prevent spam)
3 – Hidden Field that is the “Return URL” or “Thank you page” that the user will see after filling out the form (remember putting this in when you were creating your Web-To-Lead form?)
4 through 9 – These are the fields you want to pass over to SalesForce.
Put the URL (#1) in the single field directly under the “Redirect” radio button you choose earlier.
Here is where most people make a mistake, so be careful.
Step 5: Build Your “Query String”
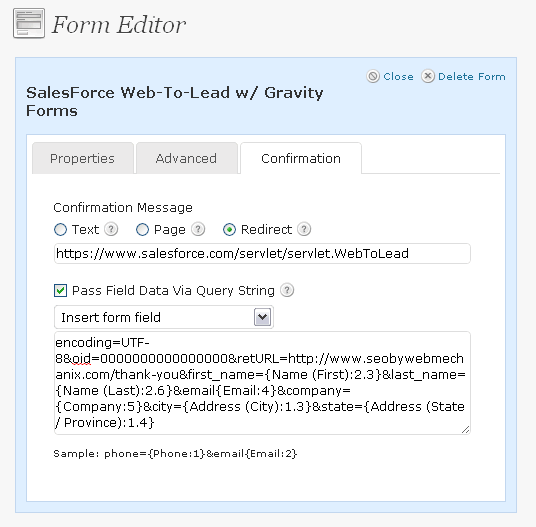
IMPORTANT: From the action URL (#1 in picture above) – you must remove “?encoding=UTF-8” and put it as the first variable in your query string (see images below).
There must NOT be a “?” in the REDIRECT URL (because Gravity Forms will automatically append one to the start of the query string).
Starting with oid and retURL (#2 & #3) – let’s start building our “query string” which passes the contact form’s data to SalesForce.
Here is the general format for building the query string:
field_name=field_value&2nd_field_name=2nd_field_value
field_name – just as it sounds; the name of the data field (ie. “company”)
field_value – again, just like it sounds; this is the value (ie. “WebMechanix”)
Important note: Did you notice that ampersand (&) between field_value and 2nd_field_name? – That “&” separates each field name and value combination.
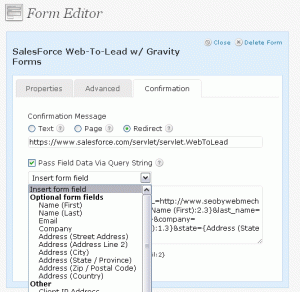
Now, for the rest of the fields (#4 through #9), use the “Insert Form Field” drop down that Gravity Forms provides.
For the field_name portion of the query string, use the bolded “name” field from the SalesForce Web-To-Lead HTML (ie. #4 would be first_name, #6 would be email, and #9 could be state).
Here is our final query string:
encoding=UTF-8&oid=0000000000000000&retURL=https://www.webmechanix.com/thank-you&first_name={Name (First):2.3}&last_name={Name (Last):2.6}&email{Email:4}&company={Company:5}&city={Address (City):1.3}&state={Address (State / Province):1.4}
Few things to note:
- MAKE SURE you remove the encoding=UTF-8 out of the redirect URL
- You have to type the field_name yourself (those that are bolded), which you get by looking at the SalesForce form.
- When you use the Gravity Forms “Insert Form Field” picker, it puts {curly brackets} around where the field value is going to be dynamically inserted.
- Don’t forget the “&” between field name and value combination, but don’t put one at the very end
Step 6: Save It & TEST!
Only one way to know if your WordPress & SalesForce Integration with Gravity Forms worked, right?
Give it a whirl!
Of course, you will need to know how to put your Gravity Form onto your website, but if you don’t know how to do that – you could just save the form and choose the “Preview Form” option.
Fill the form out with test data, submit it, and check for two things:
- Did you eventually get redirected to the correct “thank you page”?
- Did the data make its way to SalesForce? (look under the navigation item “Leads”)
Did it work? If not, try, try again… if it still doesn’t work – let us have a look at it.
Step 7: Be Proud & Show Someone!
Seriously, this is a very valuable activity, especially for larger organizations that have hungry sales people that rely on SalesForce.
Don’t Forget To…
Being that we (WebMechanix) are an internet marketing company, I couldn’t end this post without reminding you to:
- Set up a Google Analytics Goal on that “thank you page” so you can track where your visitors are coming from and which pages they are viewing before filling out your contact form
- Set up a “notification to administrators” within Gravity Forms email notifications or SalesForce to email you as soon as the form is submitted or a web-to-lead is created.
The sooner you get in touch with the lead, the higher the chances of converting it into a sale. That’s the topic for another conversation.
I really hope this helped you surgically perform a WordPress SalesForce Integration with Gravity Forms.
If you still need assistance, don’t hesitate to contact us for help.
Learn more about WordPress SEO
Most newsletters suck...
So while we technically have to call this a daily newsletter so people know what it is, it's anything but.
You won't find any 'industry standards' or 'guru best practices' here - only the real stuff that actually moves the needle.

