SalesForce Web-To-Lead PHP Form Processor cURL API Tutorial
This is a tutorial on how to use PHP cURL API to send captured lead data to SalesForce using their web-to-lead functionality.
There is a step-by-step tutorial below and a secure PHP form processor you can download and use freely.
If you want to capture leads from your website and have them go into SalesForce, this tutorial is for you.
Click here to start the tutorial — or read on to see what you can do with this method.
If you’re experiencing some difficulties or limitations with the form that SalesForce gives you.
This tutorial is for you.
Perhaps you need to accomplish something like…
Reasons to use PHP form processor to create SalesForce leads
- retURL redirect from SalesForce isn’t working
This method doesn’t rely on SalesForce’s redirect. If you experienced the redirect hanging up and not working properly, this method is for you. - Choose a dynamic “thank you” page
You’re not restricted to just one “thank you” page with the retURL input field – instead, you can choose a dynamic “thank you” page based on time of day, URL query parameters or user input. - Manipulate the data before sending it off to SalesForce
Say you want to add or change some data before it makes its way to the CRM. Maybe you want to know how long it took the user to fill out the form, or you want to reformat the address into one field for easy mail merges later down the line… whatever you need to do, you can accomplish without restriction with PHP cURL API. - Send the data to more than one place
With traditional SalesForce web-to-lead form, the data goes directly to SalesForce and that’s it. With the PHP cURL method, you can send the data to other systems at the same time as you’re sending it to your CRM.
SalesForce Web to Lead PHP cURL API Tutorial
Alright, let’s learn how to use a PHP form processor to send lead data to SalesForce…
You will need ::
- A text editor and a way to save files to your server (FTP)
- Your SalesForce web-to-lead capture form
- Some knowledge of PHP & HTML
Step 1: Get your SalesForce form code
Hop into SalesForce and get your web-to-lead code. You should have something that looks like this:

Step 2: Change the form action
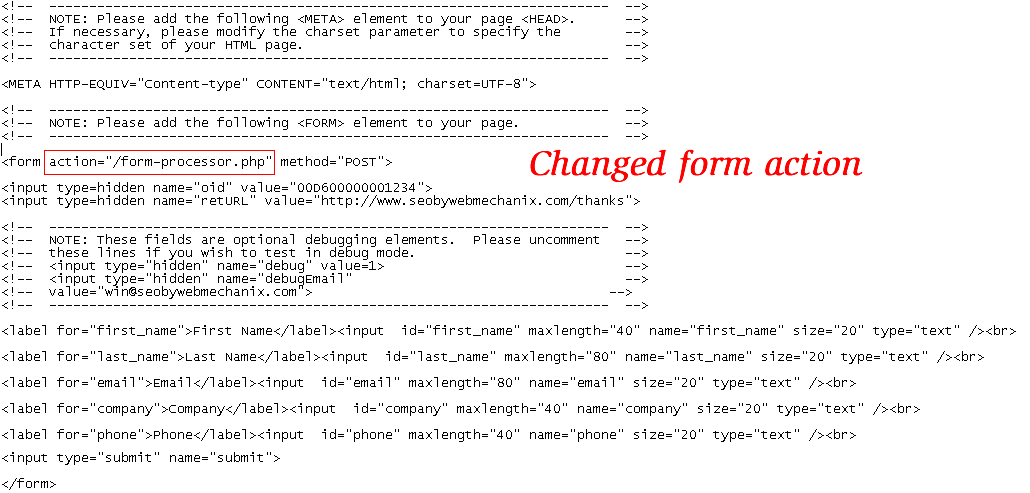
Now, you want to change the form’s action to a custom PHP file that we’re going to create later.
Save the old form action for later use… or just copy and paste it from here:
https://www.salesforce.com/servlet/servlet.WebToLead?encoding=UTF-8

Change the form action to /form-processor.php
Step 3: Create the PHP form processor file
Using an FTP connection, create a file called form-processor.php on the root of your public web directory.
NOTE: If you’re using WordPress and don’t have an FTP editor — you can create a new [theme] file without ftp access.
PHP Form Processor using cURL API for SalesForce
Copy and paste this code into that file and save it:
//Initialize the $query_string variable for later use
$query_string = "";//If there are POST variables
if ($_POST) {//Initialize the $kv array for later use
$kv = array();//For each POST variable as $name_of_input_field => $value_of_input_field
foreach ($_POST as $key => $value) {//Set array element for each POST variable (ie. first_name=Arsham)
$kv[] = stripslashes($key)."=".stripslashes($value);}
//Create a query string with join function separted by &
$query_string = join("&", $kv);
}//Check to see if cURL is installed ...
if (!function_exists('curl_init')){
die('Sorry cURL is not installed!');
}//The original form action URL from Step 2 :)
$url = 'https://www.salesforce.com/servlet/servlet.WebToLead?encoding=UTF-8';//Open cURL connection
$ch = curl_init();//Set the url, number of POST vars, POST data
curl_setopt($ch, CURLOPT_URL, $url);
curl_setopt($ch, CURLOPT_POST, count($kv));
curl_setopt($ch, CURLOPT_POSTFIELDS, $query_string);//Set some settings that make it all work :)
curl_setopt($ch, CURLOPT_HEADER, FALSE);
curl_setopt($ch, CURLOPT_RETURNTRANSFER, FALSE);
curl_setopt($ch, CURLOPT_FOLLOWLOCATION, TRUE);//Execute SalesForce web to lead PHP cURL
$result = curl_exec($ch);//close cURL connection
curl_close($ch);
Step 4: Install your SalesForce form
Copy and paste the web-to-lead HTML that SalesForce gave you (with the form action modification described in step 2) onto a page in your website.
If you need help with his, just let us know!
Once you publish that page and it’s live on your website, you’re ready to…
Step 5: Test it!
At this point you should have:
- A SalesForce web-to-lead form with the form action changed to /form-processor.php on your website.
- A file called form-processor.php on the root of your web server that has the code above as the contents of the file.
Now all you have to do is navigate to your form and test it!
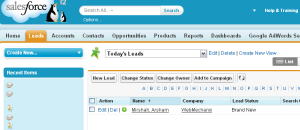
Just fill the form out with the appropriate information and send it off… then log into your SalesForce and click the “Leads” tab, then change the view to “Today’s Leads” and press “Go!” — You should see yourself in there!
If it worked, continue to step 6 .. otherwise, either tweet @WebMechanix or comment below and we’ll try to help…
Step 6: Tell the world you were successful!
Don’t be shy, let the world know that you used this tutorial to integrate your website with SalesForce using PHP cURL library — this is relatively advanced stuff, you should be proud of yourself! 🙂
You could tweet it… share it on Facebook… Digg it… maybe even +1 it with your Google buddies:
Thanks for sharing!! – Until next time, Arsham out.
Most newsletters suck...
So while we technically have to call this a daily newsletter so people know what it is, it's anything but.
You won't find any 'industry standards' or 'guru best practices' here - only the real stuff that actually moves the needle.


